
How to Pull a Perfect Espresso Shot at Home: Complete Guide
A shot of espresso has a reputation as something mysterious, best left to baristas with years of training and machines that cost more than a used car. It isn't. Pulling a great shot at home is a skill made of a handful of repeatable steps, and once you understand what each one does, you can troubleshoot your way to consistency instead of guessing.
Understanding Espresso Extraction Basics
A perfect espresso shot starts with a definition: roughly an ounce of concentrated coffee, pulled in under a minute, topped with a layer of reddish-brown crema. But "perfect" is really a target, not a fixed point. Three things define it: yield (how much liquid comes out), timing (how long water runs through the grounds), and appearance (the color and texture of what lands in the cup).
Here's what's happening at the machine level. Hot water, pushed through finely ground coffee at roughly 9 bars of pressure, extracts soluble compounds from the grounds: sugars, acids, oils, and aromatic compounds, essential for a great espresso every time. How much of each gets extracted, and in what order, determines whether the shot tastes balanced or off.
Extraction happens in phases. Early in the shot, water pulls out the lightest, most soluble compounds from the coffee grounds, mostly acids and a little sugar, affecting the overall extraction time. This is why an under-extracted shot tastes sour and thin. As extraction continues, you move into a sweet spot where acids, sugars, and body sit in balance. Push extraction too far, and you start pulling bitter compounds and woody, papery flavors from the grounds themselves.
This is the logic behind the golden ratio in any espresso shot extraction guide: roughly 1 part ground coffee to 2 parts liquid espresso, extracted in 25 to 30 seconds. If you've wondered what the 30-second rule for espresso actually means, this is it: a rough timing target that, combined with the right dose and yield, lands most shots in that balanced middle phase. It's a starting point, not a law. Learning how to pull an espresso shot well means learning to read the cues, not just watching a stopwatch.
Essential Equipment Setup for Home Espresso
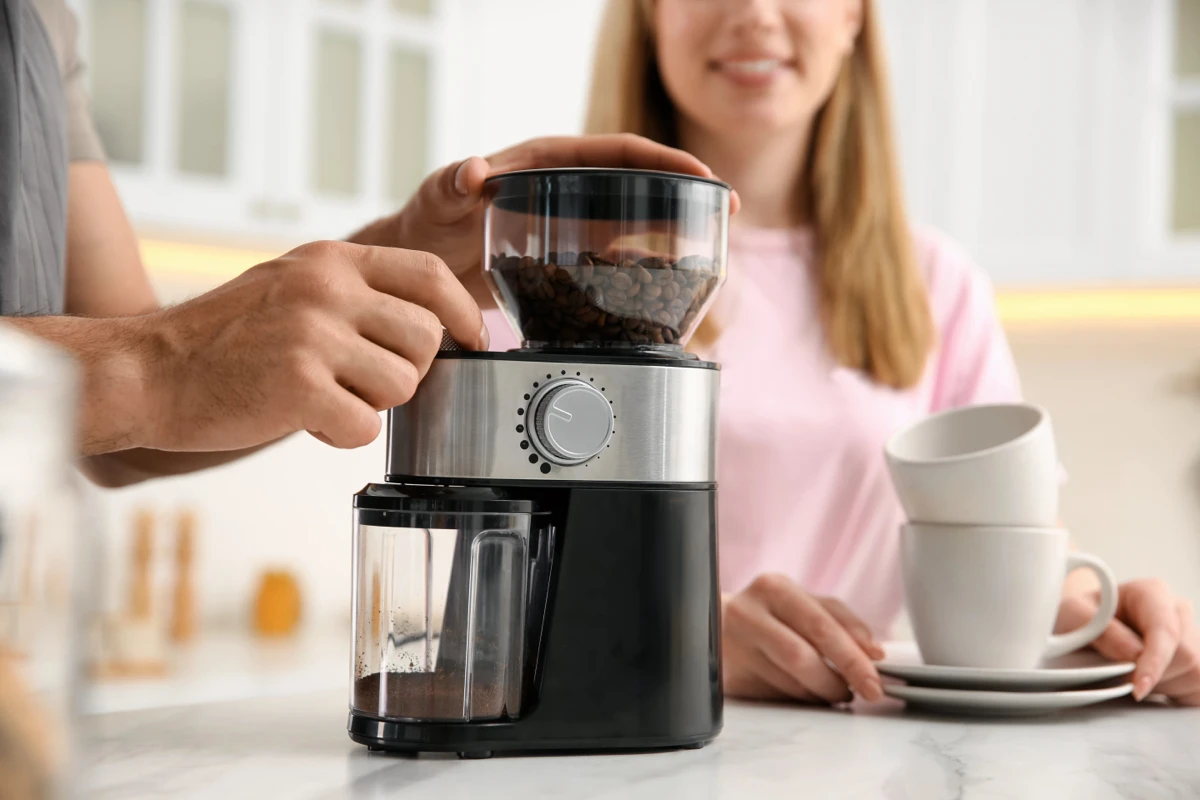
You don't need a five-figure setup to make good espresso at home, but a few pieces of equipment matter more than others. At minimum: an espresso machine with a working pressure system, a grinder capable of fine, consistent grinds, a tamper that fits your portafilter basket, a scale accurate to 0.1 grams, and a timer.
That grinder point is the foundation of any espresso machine setup guide worth following: most disappointing home shots trace back to one of these pieces being wrong, not to the person making them. A blade grinder, for instance, can't produce the consistent fine particles espresso needs, no matter how good your technique is.
Before your first shot, give the machine time to warm up to ensure you pull the perfect shot. Boilers and group heads typically need 15 to 30 minutes to reach a stable temperature, and pulling a shot too early often produces inconsistent results even with good technique. Many machines benefit from a quick flush, running a short burst of water through the group head right before brewing, to stabilize the temperature at the puck itself.
Water quality matters more than most beginners expect. Heavily filtered or distilled water can under-extract coffee because it lacks the minerals that help extract flavor compounds. Tap water that's too hard can clog and scale your machine over time. Filtered water with moderate mineral content, or a dedicated espresso water mix, is usually the safer middle ground.
Portafilter baskets come in different sizes, typically single, double, and sometimes triple, and the basket needs to match your dose. A double basket built for 18 grams won't perform the same way when packed with 14 or 22 grams, impacting your ability to pull the perfect shot. If you're working through the fundamentals of pulling espresso as a beginner, check the basket size stamped near the rim and dose accordingly.
Finally, clean your machine before first use, and build a basic habit from day one: backflushing with a blind basket weekly, wiping down the group head daily, and descaling on a schedule based on your water hardness. Old coffee oils build up fast and will make even a solid technique taste muddy.
Dialing In Your Espresso Grind Size
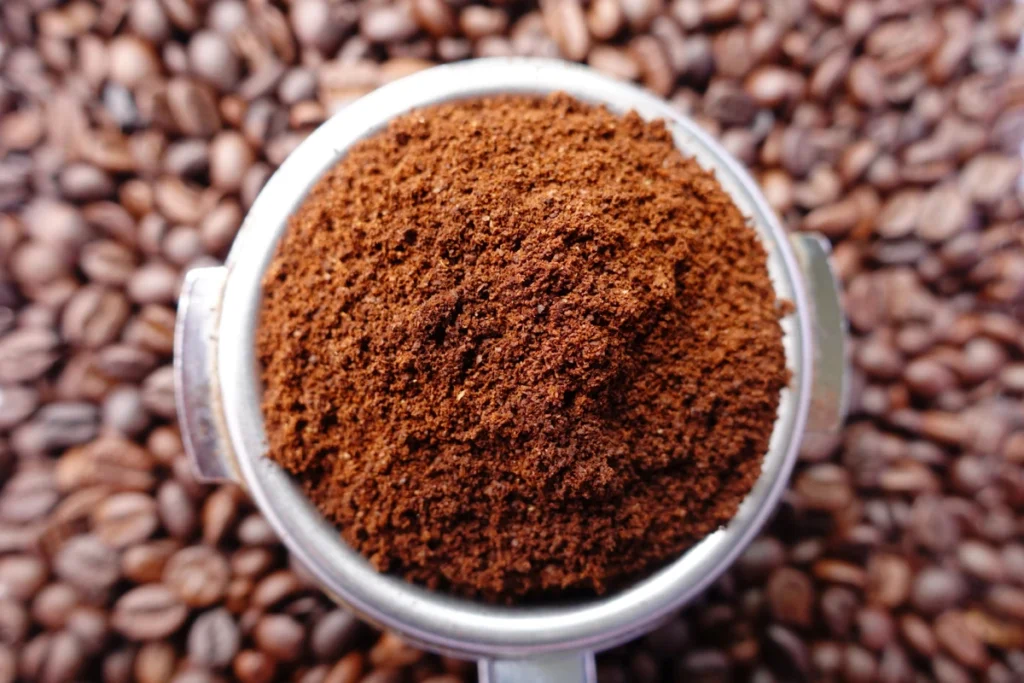
Grind size is the single most influential variable in espresso, more than dose, tamping pressure, or even bean freshness. That's because grind size controls resistance: how hard the water has to work to push through the coffee bed. Too coarse, and water rushes through with little resistance. Too fine, and it barely gets through at all, resulting in a bitter shot instead of a balanced shot.
For espresso, you're aiming for a texture finer than table salt, closer to powdered sugar but with a slight grittiness, distinctly finer than what you'd use for drip or pour-over. This fineness creates just enough resistance to slow the water down to that 25- to 30-second window without choking the machine entirely.
Dialing in is a process of small, deliberate adjustments. Start with your grinder's recommended espresso setting if it has one, pull a shot, and time it. If the shot runs faster than 25 seconds, your grind is too coarse, so tighten it slightly. If it runs slower than 30 seconds and drips rather than flows, it's too fine, so open it up a notch to ensure you get a balanced shot. Make one adjustment at a time and pull another shot before changing anything else; stacking multiple changes makes it nearly impossible to know what fixed or broke the result.
Taste is the real tiebreaker. A shot can hit 27 seconds and still taste sour or bitter, so use timing as a first filter and your palate as the final judge. If timing looks right but the shot tastes thin and sharp, the grind may still be slightly coarse. If it tastes harsh despite being properly timed, it may be running too fine for that particular bean.
A few patterns are reliable when troubleshooting. Grind too coarse, and you'll see a fast, thin stream, light-colored crema, and a sour, watery taste. Grind too fine and you'll see a slow drip or stalled flow, dark crema, and bitter, harsh flavor, sometimes with almost no flow at all in extreme cases.
Burr grinders are worth the investment over blade grinders for anyone serious about espresso grind size for home brewing. Burr grinders crush coffee between two abrasive surfaces, producing consistent particle sizes. Blade grinders chop unevenly, creating a mix of large chunks and fine dust in the same batch, which extracts inconsistently no matter how carefully you tamp or dose. Of all the home espresso shot tips out there, "upgrade your grinder before your machine" is usually the one with the biggest payoff.
Proper Dosing and Tamping Technique
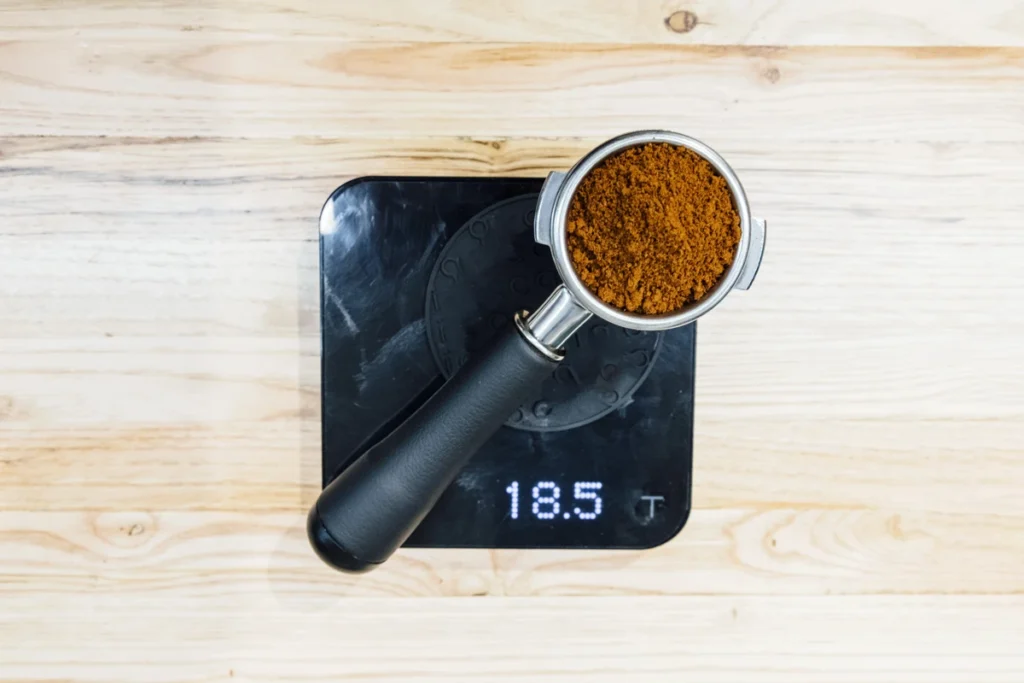
Dose is the amount of ground coffee you put into the portafilter basket, and for most double-shot baskets, that's 18 to 20 grams. Weighing your dose on a scale rather than eyeballing it removes one major source of inconsistency between shots, and it's a habit worth building early.
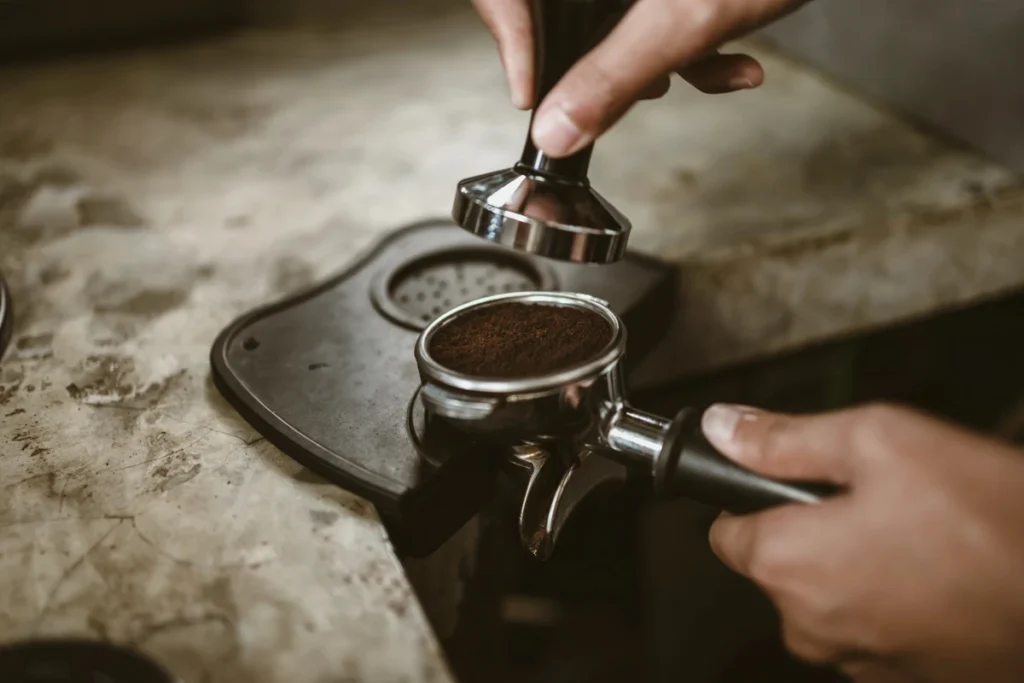
Distribution, getting the coffee grounds evenly spread across the basket before tamping, matters almost as much as the tamp itself for achieving a great espresso. A WDT tool, a set of fine needles used to stir and break up clumps, is the most reliable method, breaking apart clumps that would otherwise create weak spots in the puck. Simpler methods, like tapping the portafilter on the counter or using a leveling tool, can also work but tend to introduce more inconsistency.
Tamping comes next, and the target is roughly 30 pounds of even, consistent pressure straight down. More pressure than that doesn't meaningfully improve extraction; what matters far more is levelness. A tamp that's even on one side and lighter on the other creates a path of least resistance, and water will follow that path.
Good tamping posture helps with consistency: keep your wrist straight and let your shoulder and arm provide the pressure rather than twisting from the wrist, which tends to introduce a slight tilt. Press straight down, check that the tamper sits level against the basket rim, and avoid polishing or twisting motions, which can actually disturb an otherwise even puck.
This levelness is the real reason any espresso tamping technique guide spends so much time on it: uneven density in the puck is the leading cause of channeling, where water finds a low-resistance gap and rushes through it instead of passing evenly through the whole coffee bed. Channeling shows up as a fast, sometimes spurting shot with pale streaks in the crema and a thin, sour taste, even when grind and dose were otherwise correct.
Common mistakes worth watching for: tamping at an angle, tapping the portafilter hard enough to disturb the puck after tamping, and inconsistent dosing from shot to shot. Fixing these three is often the difference between an unpredictable home setup and one that reliably produces good espresso shot results.
Step-by-Step Espresso Pulling Process
With equipment warmed up, grind dialed in, and a properly tamped puck locked into the group head, here's the full sequence for pulling the perfect espresso shot at home, start to finish.
- First, weigh your dose, 18 to 20 grams for most double baskets, and grind directly into the portafilter if your setup allows it, to minimize how long the grounds sit out, losing aroma. Distribute with a WDT tool or light tapping, then tamp with even, level pressure.
- Lock the portafilter into the group head right away, since grounds begin losing quality the moment they're exposed to air. Place your cup or shot glass on the scale beneath the spouts and zero it.
- Start the shot. Many machines include a pre-infusion phase, a brief period of lower pressure before full extraction pressure kicks in. Pre-infusion gently saturates the puck, allowing it to expand evenly before the higher-pressure phase, reducing the risk of channeling and producing a more uniform extraction for that perfect shot. If your machine doesn't have built-in pre-infusion, some home baristas approximate it with a slow pump ramp-up, though results vary by machine, making it harder to achieve a great espresso every time.
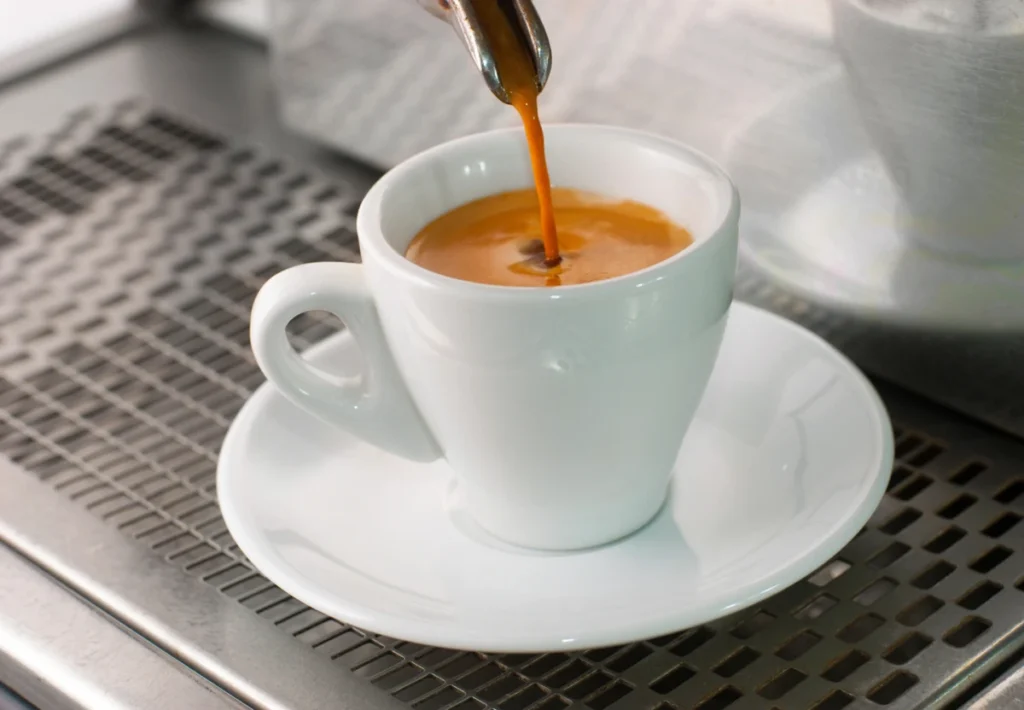
- Watch the shot as it runs. In the first few seconds, you should see thick, slow drops, sometimes called the first drops, followed by a steady stream. Color starts dark and gradually lightens as extraction continues, a visual sign you're moving from the early, syrupy phase into fuller extraction. Toward the end of a well-pulled shot, you'll often see tiger striping, alternating light and dark streaks in the crema as it pours, a strong visual cue that extraction is even.
- Time the shot from when it starts flowing, not from when you press the button, since pre-infusion time can vary. The target window is 25 to 30 seconds of actual flow, though this can shift slightly depending on bean and roast.
- Watch your yield on the scale rather than relying purely on time. For an 18- to 20-gram dose, you're generally targeting 36 to 40 grams of liquid out, at the 1:2 ratio mentioned earlier. Stop the shot once you hit your target yield, even if the timing is slightly off; yield and taste matter more than hitting an exact second count.
- Once the shot stops, look at the result. It should be a deep reddish-brown, topped with tan-to-caramel-colored crema roughly 2 to 4 millimeters thick. Give it a quick stir if you're drinking it straight, since the bottom of the shot tends to taste different from the top, then taste it. This combination of watching, timing, and weighing makes pulling an espresso shot repeatable rather than a matter of luck.

Troubleshooting Common Espresso Problems
Even with a solid process, shots go wrong, and knowing how to read the result is most of home espresso troubleshooting.
Sour shots usually point to under-extraction. The most common causes are a grind that's too coarse, water temperature that's too low, or a shot pulled too fast relative to its yield. Tightening the grind slightly, confirming your machine has fully reached temperature, and double-checking your dose are the first three things to adjust.
Bitter shots point in the opposite direction, indicating a problem with extraction time or grind size. over-extraction. This can come from grinding too fine, water that's too hot, a shot that ran too long for its yield, or beans that are stale or roasted very dark, which extract bitter compounds more easily. Try a slightly coarser grind first, and check the roast date on the bag; coffee much past three to four weeks off-roast often tastes flatter and more bitter regardless of technique.
Channeling is its own category and shows up differently: A shot that starts fast, sometimes sprays or spurts unevenly, and shows pale streaks through the crema rather than even tiger striping can lead to a less-than-perfect shot of espresso. This traces back to distribution and tamping, not grind size, which are crucial to pulling the perfect shot. Revisit your WDT or tapping method, make sure your tamper is level, and check that your basket and shower screen are clean, since debris can create uneven flow paths.
Shots that run too fast or too slow, regardless of taste, are grind- and dose-related issues first. Too fast, under 20 seconds for typical doses, usually means the grind is too coarse, or the dose is too low for the basket. Too slow, well past 35 seconds with thin or stalled flow, usually means too fine a grind or too much dose for the basket size.
Weak or watery espresso, distinct from sour, sometimes means your dose is simply too low for your basket size, or your tamping pressure is inconsistent shot to shot, which can hinder your ability to pull the perfect shot. Confirm your scale readings and basket size match.
Crema issues, thin, pale, or quickly disappearing crema, often trace back to bean freshness rather than technique. Crema is largely a byproduct of carbon dioxide released during roasting, so beans more than a month past the roast date, or beans roasted very lightly, naturally produce less of it. That doesn't necessarily mean the shot tastes bad, but it's worth knowing before chasing a fix that doesn't exist. Learning how to get good espresso at home means distinguishing between cosmetic issues, like Crema, and flavor issues, like sourness or bitterness, since they don't always share the same cause.
Tasting and Refining Your Espresso Shots
Technique gets you in the right range, but taste is what actually confirms a great shot. Build a habit of tasting every shot the same way: take a small sip on its own, let it sit on your tongue for a second before swallowing, and pay attention to four things: sweetness, acidity, bitterness, and body.
Use these four as a simple decision tree. If a shot tastes sharp and sour with a thin body, lean toward under-extraction and adjust the grind to be finer or slightly increase the yield. If it tastes flat, harsh, or bitter with a dry finish, lean toward over-extraction and adjust the grind coarser or pull a shorter shot. If sweetness and body are present but something still feels slightly off, you're likely close, and small adjustments, a gram of dose, a few seconds of timing, will get you there faster than large changes.
Keeping notes matters more than it seems like it should. Jot down dose, yield, time, and a one-line taste note for each shot, especially while you're dialing in a new bag of beans. Patterns emerge fast this way: you'll notice that certain beans want a slightly coarser grind, or that a particular roast level consistently needs a shorter shot for optimal extraction time.
Bean origin and roast level both shift your starting point. Lighter roasts tend to be denser and often need a slightly finer grind and sometimes a longer extraction time to develop sweetness for that perfect shot of espresso. Darker roasts are more porous, extract faster, and can turn bitter quickly if pushed too far. Single-origin beans, especially lighter ones, often reward a bit more experimentation than blends built specifically for consistency across batches.
This is really the heart of the best home espresso technique: not a single fixed recipe, but a feedback loop between what you taste and what you adjust, repeated until the two start to line up, shot after shot.